Search This Blog

Wednesday, December 31, 2014

Tiramisu!

With a new year approaching we need to indulge in something special. And a Tiramisu never fails to tantalize our ever craving taste buds. Eat and drink and be merry. To a new year!

Ingredients 

1) 500 ml cream
2) Juice from a lemon
3) 1 cup espresso
4) 8  tbsp castor sugar
5) 3 eggs separated
6) Vanilla sponge cakes
7) 2 tsp cinnamon powder
8) 1 tsp vanilla essence
9) 1 tbsp Cocoa

Recipe

1) Heat the cream in a double boiler for 15-30 minutes, until the cream starts bubbling. Add the lemon juice and let the cream curdle. Keep stirring over simmering water for 10 minutes until the cream thickens, a little. Pack the thickened cream in a muslin cloth and let it hang over a container over night. This ensures that all the water is drained out and the cream gets a yogurt consistency. This is your substitute for Mascarpone cheese.
2) In a double boiler, whisk the eggs yolks with 5 tbsp sugar until it becomes pale and light. Whisk in the cinnamon powder, vanilla essence and 1/2 cup(and 2-3 tbsp more) of the espresso. Next, incorporate the mascarpone like cheese, you have made over night. Whisk until there are no lumps. Remove from heat and let it cool. This is your Mascarpone cream.
3) In a separate bowl, beat the eggs whites with 1 tbsp sugar until soft peaks form. Fold this into the cooled down Mascarpone cream.
4) Line a tray with the sponge cake pieces. Add the remaining sugar to the unused espresso. Pour 1/2 of this espresso over the cakes. Spoon the mascarpone cream on top of sponge cake layer. Dip the sponge cakes into the last bit of espresso. Make a third layer with them. Finish off by making a fourth layer with the mascarpone and lightly dust cocoa powder over it. Refrigerate for 2-3 hours. Your Tiramisu is ready!

Leave a comment @Oishiibites

Do use #oishiibites if you decide to try the recipe out and upload photographs. Enjoy! 

Tuesday, December 30, 2014

Mushroom Quiche!

Midnight snacking has become such an essential routine in our lives, thanks to all the dawdling on our laptops. Untimely hunger pangs are bound to happen. That is when this easy, cheesy crust less mushroom quiche recipe comes to my rescue. :) 

Ingredients 

1) 1/2 cup cream
2) 2 eggs
3) 10 tbsp milk
4) 2 tbsp cornflour
5) 1/2 tsp nutmeg
6) 1/2 tsp salt
7) 200 gm mushroom
8) 4 onions
9) 1 tbsp chopped garlic
10) 1/2 cup cheese

Recipe 

1) Sautee the chopped mushroom in 1 tbsp butter with the garlic and onions.
2) Meanwhile, whisk the cream, eggs, milk, cornflour, nutmeg and salt to form the quiche batter.
3) Line the bottom of 6 greased ramekins with a little bit of the shredded cheese. Spoon the mushroom mixture in and pour the quiche batter over it. Top it with the remaining shredded cheese and pop them into the oven.
4) Bake for 20 minutes in a preheated oven(220 C). Let the quiches cool down. This ensures that they come out of the ramekins, easily. Snack away!

Leave a comment @Oishiibites

Do use #oishiibites if you decide to try the recipe out and upload photographs. Enjoy! 

Monday, December 29, 2014

Peanut butter and sesame noodles!

This might be absurd but my hankering for cold noodles increase during the winter. Here is to some December food hogging with one of my favorite cold noodles. Pack it in boxes and refrigerate for those special midnight snacking needs. Crack open a beer and you are good to go!

Ingredients

1) 1 tbsp Soy sauce
2) 2 tbsp lemon juice
3) 2 tbsp sweet chili sauce
4) 1 tbsp Garlic oil (Fry garlic and use the oil)
5) 1 tbsp sesame oil
6) 100 gms peanut butter
7) 3-4 packets of noodles, boiled
9) 2 green bell peppers
10) 2-3 tbsp beansprouts
11) 2-3 spring onions finely chopped
12) 2 tbsp coriander finely chopped
13) 1/4 cup shredded Iceberg lettuce
14) 1/2 cup mushrooms, sauteed in butter
15) 1 tbsp sesame seeds

Recipe

1) Make a dressing with the soy, lemon juice, sweet chili sauce, garlic oil, sesame oil and peanut butter. Whisk all of them together.
2) Assemble the noodles, bell peppers, beansprouts, spring onions, lettuce and mushrooms in a bowl.
3) Pour the dressing on top. Mix well. Add the coriander and sesame seeds. Finish with a generous drizzle of olive oil and lemon juice.

Leave a comment @Oishiibites

Do use #oishiibites if you decide to try the recipe out and upload photographs. Enjoy! 

Saturday, December 27, 2014

Chili Crab!

Last week, I was vacationing in Andaman.  Now, I am having strong and unbearable  post holiday pangs about returning to white sands and blue waters. I had an amazing plate of 'Chili Crab' on Havelock and have been meaning to cook the same. Here goes nothing!!! 

Ingredients 

1) 6 medium sized crabs
2) 6 spring onion bulbs, chopped
3) 2 tbsp chopped garlic
4) 1 tbsp ginger, finely chopped
5) 5-6 green and red chilies, chopped
6) 1 tsp crushed pepper corn
7) 2 tbsp vinegar
8) 2 tsp Kashmiri red chili powder
9) 1/2 cup oil.

Recipe 

1) Heat the oil in a pan and fry the crab pieces for 5-6 minutes. Keep aside.
2) Add the garlic, ginger, spring onion bulbs, Kashiri red chili powder, red and green chili to the oil. Stir for a minute. Next, add 1/2 cup water, a pinch of salt and the crab pieces. Stir and cover with a lid. Let it cook for 5 minutes.
3) Incorporate the vinegar and peppercorn and remove from heat. Serve hot with spring onion and chilies. Squeeze fresh lime juice on top.

Leave a comment @Oishiibites

Use #oishiibites if you decide to give the recipe a try and upload photographs. Enjoy!

Friday, December 26, 2014

Warm Christmas Pudding in Orange reduction and Butterscotch sauce!

I still remember my first Christmas pudding debacle. 

Read the rest here: 

http://www.antiserious.com/2014/12/25/ruined-christmas-pudding/

Years later, I indulge in some warm holiday nostalgia by making it again. 

Ingredients: (Do not be frightened by the sheer number of ingredients on the list. Most of them go in together)

For the pudding

1) 100 g flour
2) 200 g castor sugar
3) 200 g butter
4) 4 eggs
5) 2 tsp allspice
6) 3 tsp cinnamon powder
7) 1 tsp nutmeg powder
8) 2 tbsp Chopped nuts
9) 3 tbsp Chopped dates
10) 3 tbsp raisins
11) 2 tbsp chopped apples
12) 1 cup coarsely ground bread crumbs
13) 1-2 tbsp Orange zest
14) 1/2 cup Orange juice
15) 3 bay leaves
16) 50 g jaggery (Melt it)
17) 1 tbsp maple syrup/honey
18) 1 1/2 tsp baking powder

For Orange reduction

1) 1/2 cup orange juice
2) 2 cinnamon sticks

For the Butterscotch sauce 

1) 100 g butter
2) 2 tsp vanilla essence
3) 75 g sugar
4) 75 g golden syrup (you can replace this with honey/sugarcane juice)
5) 300 ml cream

Recipe:

1) To make the pudding, whisk the butter and sugar together until it is soft and light. Whisk the eggs into this mixture, one at a time. Carefully sieve and add the flour, baking powder, allspice, cinnamon and nutmeg powder. Whisk the liquid jaggery and orange juice into the mixture, as well!
2) Fold the apple pieces, raisins, dates, nuts and bread crumbs into the mixture with a spatula.
3) Line the bottom of a pudding basin with the orange zest and bayleaves. Drizzle maple syrup over this and spoon the pudding mixture into the basin. Carefully close the mouth of the basin with aluminum foil and strings. Place it another tumbler and fill half of it up with hot water. Cover the tumbler and steam the pudding over simmering water for 2 hours.
4) Meanwhile, reduce the orange juice with cinnamon sticks to make a spiced orange reduction (simply keep on the heat for a while and stir).
5) In a saucepan, melt the sugar and butter with the honey on low heat. Add the cream and let it bubble. Remove from heat when the sauce thickens. This is your butterscotch sauce. By now your house should smell incredible and everyone should be peeking from behind the couch.
6) Over turn the pudding onto a tray. Serve hot with the spiced orange reduction and butterscotch sauce!

Leave a comment @Oishiibites

Use #oishiibites if you decide to try the recipe out and upload photographs. Enjoy!

Monday, December 22, 2014

Orange Phirni with Walnut praline.

Oranges. Amen! There is nothing more I need to add to this blog post. Mom cooks delicious Phirni. 

Ingredients 

For the Phirni 

1) 2 cups milk
2) 2 tbsp Basmati rice
3) 1/2 cup sugar
4) 1 tsp orange rind
5) Pulp and juice from a orange

For the Walnut Praline

1) 4 tbsp sugar
2) 2 tbsp chopped walnut pieces

Recipe

1) Soak the rice for an hour. Coarsely grind it and boil the rice in the milk. Keep stirring occasionally. Once the rice is properly boiled, reduce the heat. Next, slowly add sugar while stirring constantly. Remove when the mixture thickens (needs 7-12 minutes).
2) When the mixture cools down, add the orange juice, rind and pulp. Refrigerate the Phirni!
3) In a saucepan, melt the sugar in 1 tbsp water. Keep stirring until it becomes brown.
4) Toast the walnut pieces and spread over a greased plate. Pour the caramel over the nut pieces. Tap with a spoon to see that the caramel spreads evenly. Break pieces of the praline and serve with your orange Phirni!

Leave a comment @Oishiibites 

Do use #oishiibites if you decide to try the recipe out and upload photographs. Enjoy!

Saturday, December 13, 2014

S'mores! :D

Camping outdoors is super fun. With the faint possibility of one such spontaneous trip in the offing, I decided to make Marshmallows. I like dunking them into my coffee or even better, place charred marshmallows between crackers (don't forget to spread some Nutella) and make delicious  S'mores. Small and simple winter indulgences makes me swoon! 

Ingredients

1) 1 1/2 cup sugar
2) 2 egg whites
3) 3 tbsp powdered gelatin
4) 1 tbsp vanilla essence
5) A pinch of salt

Recipe

1) Sprinkle the gelatin over half a cup of cold water and let it rest for fifteen minutes.
2) Heat(medium heat) another 1/2 cup water with the sugar and salt, in a saucepan. Keep stirring until everything dissolves. Increase the heat and discontinue the stirring. Remember, the sugar should not burn i.e the mixture should not turn into brown caramel. Stop the process if you see any signs of brown tinges, forming. The sugar syrup should be on the heat for 6-10 minutes. This requires practice. Otherwise, use a candy thermometer  and stop the cooking when the temp reached 240 F.
3) Slowly pour the hot syrup into the water with bloomed gelatin and whisk on low to medium speed. Keep whisking for 10-15 minutes until the mixture doubles. It should be fluffy and cool to the touch.
4) In a separate bowl, beat the egg whites with the vanilla essence until meringue(stiff white peaks) forms. Fold it into the sugar syrup mixture. Line a tray with icing sugar and fill it with the marshmallow mixture. Sprinkle the top with icing sugar. Refrigerate over night. Cut into squares, roll in sugar and pop em into your mouth.

Leave a comment @Oishiibites 

Use #oishiibites if you decide to try the recipe out and upload photographs. Enjoy! 

Thursday, December 11, 2014

A classic: Apple Pie!

Everything about baking an apple pie during winter, sounds right to me. Always evokes an image of a hot and steaming pie kept on a windowsill while the neighborhood kids stir up trouble. Hanna-Barbera's influence, you see! There is nothing more classic than the apple cinnamon tryst. Some might consider it blasphemous but I enjoy my slice with a hot cup of Americano. 

Ingredients 

For the pastry 

1) 2 cups plain flour
2) 100 gms butter
3) 1/4-1/2 cup cold water

For the filling 

1) 5 apples
2) 1/4 cup flour
3) 1/2 cup castor sugar
4) 2 tbsp lemon juice
5) 1 tbsp cinnamon powder
6) 1 tsp nutmeg powder

Recipe:

1) To make the pastry dough, add butter to the flour and mix gently using your hands. It should resemble a light yellow crumb. Add the cold water to form the dough. Wrap in a clingfilm and chill for 30 mins in the refrigerator.
2) Use 3/4th of the dough to make the base of your apple pie. Blind bake the base in a preheated oven(220 C) for 10-15 minutes.
3) Mix all the ingredients of the filling, together. Line your pie base with the filling and use the rest of the dough to make the pie top(as shown in the picture). Bake in a preheated oven(180 C) for 40-45 minutes or until the sides and the top become golden brown. Serve hot!

Leave a comment @Oishiibites 

Use #oishiibites if you decide to try the recipe out and upload photographs. Enjoy!
Wednesday, December 10, 2014

Liver and Onions with Mash!

Some recipes spell nostalgia for me. My earliest memory of 'Liver and onions' go back to standard fourth or fifth. There was an episode on Powerpuff Girls where Bubbles and Buttercup cook L&O for Professor Utonium as a Father's day treat. Good ol days! This here is my recipe that has gotten modified over the years. But one thing never changes i.e a generous serving of mash on the side! 

Ingredients

1) 1/2 a kg chicken liver
2) 1 cup milk
3) 1/4 cup+2 tbsp corn flour
4) 2 tbsp Ketchup
5) 4 tbsp BBQ sauce
6) 4-5 onions chopped
7) 1/2 cup boiled peas

Recipe

1) Soak the livers in the milk for an hour or more. Remove and wash properly. The milk reduces the overpowering smell of the liver.
2) Dust the livers with 1/4th cup corn flour. Heat oil and fry the liver.
3) Take 2 tbsp oil in another pan and fry the onions until translucent. Add the fried liver, peas, ketchup, BBQ sauce and the remaining cornflour(in 1/2 cup water). Remove from the pan when the gravy thickens. Add a pinch of salt and serve hot with mashed potato!

Leave a comment @Oishiibites

Use #oishiibites if you decide to try the recipe out and upload photographs. Enjoy!

Monday, December 8, 2014

Home made ice cream!

The simplest way to make home made ice cream is nothing but a matter of getting the ratio correct! I decided to whip up a tub of apricot ice cream for the weekend. In the picture: A generous serving of apricot ice cream over Darjeeling tea jelly. I froze green apples in the jelly for some added crunch. Yum! 

Ingredients:

1) 1 cup fresh cream( I used Amul)
2) 1/4 cup condensed milk
3) Fruits and other items for flavoring, as per taste ( I used half a can of fresh apricots). Make sure that there are not too many fruits! The mixture will become runny and difficult to freeze.

Recipe:

1) Simply whisk the cream and condensed milk together. The 4:1 cream to condensed milk ratio is important,
2) In a steel bowl keep the fruits and cover with the cream, condensed milk mixture. Store in the freezer for 5-10 hours. Let it freeze completely( Ice hard!).
3) Scrape the frozen mixture into a blender and blitz on high speed. Put it back into the freezer, again. Repeat this process a few times with an hour interval, until you have the ice creamy texture.

Consume the ice cream quickly as it starts losing its creamy texture, in a few days. I have tried interesting flavors ranging from an espresso ice cream, banana and nuts, tender coconut, apple and cinnamon, mint and choco chips(add the chips after the final blitz) etc! You can use your market bought Vanilla essence to make a wonderful vanilla ice cream. Have fun! 

Leave a comment @oishiibites

Do use #Oishiibites if you decide to try the recipe out and upload photographs. Enjoy!

Sunday, December 7, 2014

Kerala Chicken.

I have grown extremely fond of Keralite cuisine. My knowledge was limited to the Appam and Beef Stew you find here in Kolkata. Now, I have savored everything from Iddiyappam to Kappa and Kanava! Back home for the winter vacations, I decided to try out one of the most ubiquitous recipes found in a Malayali kitchen. I had my close friend Priscilla(Jolly) share her mother's recipe here. 

Ingredients:

1) 1 kg Chicken chopped into fine pieces.
2) 4-6 onions finely chopped.
3) A spice mix ( some cloves, cardamom, cinnamon, jeera and pepper corn taken together)
4) 1 tbsp ginger and garlic paste
6) 1 tsp turmeric powder
7) 2 tsp chili powder
8) 1/2 a coconut grated
9) 10 curry leaves

Recipe:

1) Toast the spice mix until it releases a nice fragrance. Grind the toasted mix into a fine powder. Keep aside.
2) Toast the grated coconut with the curry leaves, stirring constantly. The coconut will become dark brown in colour. Grind it into a paste and keep aside.
3) In a heavy bottom vessel, saute the onions until translucent. Add the ginger garlic paste followed by the chili and turmeric powder.
4) Now, add the toasted spice mix followed by the chicken pieces. Stir well so that the meat is properly coated with the spices. Add water and salt as per requirement. The coconut paste goes in at the very end, when the chicken is almost cooked. Sprinkle fresh grated coconut and curry leaves on top. Serve hot with rice/Appam!

Leave a comment @Oishiibites

Use #oishiibites in the picture caption if you decide to try the recipe out and upload photographs. Enjoy! 

Friday, December 5, 2014

The 2 ingredient Nutella cake!

Its been a while since my last blog post. Back home for the holidays, I couldn't wait to start with my kitchen catastrophes. Sigh! The Nutella cake is definitely not my recipe. I am pretty sure a lot of neophyte bakers such as myself have given this a try and failed miserably (read, the egg-y(sic) smell and the sticky texture). Here is all you need to keep in mind when you make this delicious 2 ingredient cake. 

Ingredients: 

1) 3 eggs
2) 1/2 a jar of Nutella (This is half the 350 g jar)

Recipe:

1) The most essential trick is beating the eggs on high speed for 6-10 minutes. A lot of air needs to enter and the mixture should triple. If this is not done perfectly the end result might be very different. (Add the invisible third ingredient: A tsp of Vanilla essence if the smell bothers you. Sorry! :P)
2) Melt the Nutella. Fold the egg mixture into the molten Nutella, in three batches. This is a very important step which ensures that the air doesn't escape. Pour the batter into a baking tray, carefully!
3) Bake in a preheated oven(180 C) for 25 minutes. Serve hot with ice cream.

Leave a comment @Oishiibites

Use #oishiibites in the picture caption if you decide to try the recipe out and upload photographs. Enjoy!

Wednesday, July 23, 2014

The frozen Chocolate Cheesecake.

The first recipe I had posted on this blog was a baked cheese cake. Here is a frozen chocolate cheesecake that needs a handful of ingredients. More importantly it doesn't require Gelatin to set. I can hear Chocoholics, everywhere, going num, num, num, num! Easy, breezy, supremely cheesy! ^___^ 

Ingredients 

1) 5-6 Digestive Biscuits
2) 50 gm Dark Chocolate
3) 100 gm Milk Chocolate
4) 30 gm White chocolate
5) 180-200 gm Creme Cheese

Recipe 

1) Crush the Digestive biscuits and use to line a tray. This is your base. Chill in the refrigerator.
2) Melt the Dark and Milk chocolate together in a double boiler. Keep 1/4 of the chocolate aside. Combine the rest with the creme cheese.
2) Pour the creme cheese chocolate mix over the chilled biscuit base. Refrigerate for an hour.
3) Use the rest of the chocolate(melt it again if it solidifies) to make a third layer. Melt the White chocolate in the double boiler. Pipe the white chocolate on top.( I made vertical lines and then used a toothpick to make the design in the picture). Refrigerate for a few hours and serve!

Leave a comment @Oishiibites 

Use #oishiibites in the picture caption if you decide to try the recipe out and upload photographs. Enjoy!

Tuesday, July 22, 2014

Crispy Potato Skins with Bacon.

Time for some more Weekend indulgence. God bless the Epicure who came up with the idea for Crispy Potato Skins. This would go perfectly well with crackling ham and some Wine.  Have a spiffing Brunch everyone. Bon Appetit

Ingredients 

1) 2 Potatoes
2) 2 tsp Salt
3) 2 tsp Black Pepper

For the filling
1) 1/2 cup Sweet corn
2) 2 slices of Bacon, fried and chopped.
3) 1/4 cub Scallion, chopped
4) 1/2 cup shredded cheese

Recipe 

1) Using a fork prick the potatoes, all over. Transfer to a baking dish and sprinkle with the salt and pepper. Microwave them on High power(900) for 7 minutes. The skin of the potatoes will shrivel up. When the potatoes have cooled down, slice them into halves and scoop the potato flesh out. Scoop as much as possible, without tearing the skin.
2) Brush both the sides of the potato skin with butter. Apply salt and pepper from the pan to the potato skins. Keep on a high rack and bake in a preheated oven(200 C) for 10-15 mins(each side or until the potato skin crisps up).
3) In a bowl combine the Potato flesh with the corn and scallions. Fill up the Crispy Potato skins with this filling. Top with the bacon and shredded cheese. Bake in a preheated oven(180 C) for 12-15 mins. Drizzle with some lemon juice and serve hot!

Leave a comment @Oishiibites 

Use #oishiibites in the picture caption if you decide to try the recipe out and upload photographs. Enjoy!

Friday, July 18, 2014

Breakfast Drink Specials! :)

The title of the blog post is pretty self explanatory. Both the drinks are super tasty and go fantastic with some toast and scrambled eggs in the morning. More importantly, both are super easy to make. Don't shy away from making yourself a few glasses during the day. They are that yummy and the summer heat is going nowhere. The recipes have been designed so that all the flavors shine through. Drink up! 

Ingredients

For the Oreo Shake
1) 4-5 Oreo Biscuits
2) 1 cup Milk
3) 3 scoops Vanilla Ice Cream
4) 2 tsp Honey
5) 2 tbsp Peanut Butter

For the Banana Coffee Smoothie
1) 1 ripe Banana
2) 1 cup Milk
3) 3 Scoops Vanilla Ice Cream
4) 1 tbsp Molten Nutella
5) 2 tbsp Instant Coffee

Recipe

1) For each drink blend all the ingredients together. Remember to separately mix the Instant coffee with the milk, first(Banana Coffee Smoothie), to incorporate the flavour properly.
2) Serve in Chilled Glasses!

Leave a comment @Oishiibites

Use #oishiibites in the picture caption if you decide to try the recipe out and upload photographs. Enjoy!

Thursday, July 17, 2014

Vegetarian Shepherd's Pie. ^__^

On discovering the dearth of classic vegetarian recipes on my 'Oishii' blog, a friend suggested I make a vegetarian Shepherd's pie. He shared the recipe with me and requested that I try it out. Maybe, even put it up on the blog if I found it to my taste. And I must agree, I loved it. A simple but delicious meal. I remember having something similar at Hampi with Garlic Cream on the top. I used the same idea here and incorporated the garlic cream recipe as an accompaniment to this easy to bake dish. Serve Hot! 

Ingredients 

1) 4 Potatoes
2) 20 cloves of Garlic
3) 3 tsp Black Pepper
4) 2 tsp Salt
5) 2 tbsp Oil
6) 1 cup Black Lentil(Masoor dal)
7) 1 Carrot, chopped
8) 8-10 Mushrooms
9) 1/2 cup different types of chopped vegetables(Aubergine, Okra, Bell pepper etc)
10) 1 Bread slice soaked in milk.
11) 4 eggs
12)  2 tbsp Butter

For the Garlic Cream
1) 1/2 cup Fresh Cream
2) 1/2 cup Processed cheese, grated.
3) 2 cloves of crushed garlic

Recipe 

1) Prick the Potatoes with a fork. Bake the Potatoes and 10 gloves of unpeeled garlic for an hour(180 C). Mash the potatoes with the garlic, butter, Salt(1 tsp) and Black Pepper(1 tsp). Keep aside.
2) In a pan, fry the remaining cloves of garlic(chop em up) in oil. Add the vegetables, lentil, mushrooms and the remaining salt. Cook for 5-10 mins. Remove.
3) Whisk the eggs in a bowl with the remaining 1 tsp Black pepper and the bread crumbs. Incorporate this into the cooked vegetable mix. Arrange in a baking dish.
4) Spread the mashed potato layer on top of the vegetable layer in the baking dish. Brush the top with a little bit of oil. Bake in a preheated oven(200 C) for half an hour.
5) Combine the cream and cheese together on medium heat. Remove from heat and add the crushed garlic. Mix well. Serve portions of the Shepherd's pie with dollops of Garlic cream. :D Dig in!!!

Leave a comment @Oishiibites

Use #oishiibites in the picture caption if you decide to try the recipe out and upload photographs. Enjoy!

Wednesday, July 16, 2014

Shahi Tukda! :)

I had fallen in love with 'Shahi Tukda', the first time I had it in Mumbai. I often make it at home. Even though I am not the biggest fan of Indian sweets, I go back to this dessert, from time to time. Something about that beautiful Elaichi flavor and bread fried in ghee, I guess. :P Num, num, num, num! Serve with hot chai. 

Ingredients 

1) 1 1/2 cup Milk
2) 1/4 cup Condensed Milk
3) Bread crumbs from a slice of bread
4) 1/4 tsp Elaichi(Cardamom) powder
5) 1/4 tsp Nutmeg powder
6) 4 slices of bread.
7) 2-4 tbsp Ghee

Recipe 

1) Fry the slices of bread in Ghee until the bread turns golden brown.
2) Combine the rest of the ingredients together and bring it to a boil. Stir continuously. Let the mixture thicken. Remove from the heat.
3) Pour the warm Rabdi mixture over the fried bread pieces. Garnish with saffron and toasted nuts. Chill and serve!

Leave a comment @Oishiibites

Use #oishiibites in the picture caption if you decide to try the recipe out and upload photographs. Enjoy!

Friday, July 11, 2014

Afghani Korma!

Lately, I have been experimenting with Middle Eastern flavors. That is how I came across the recipe for an Afghani Chicken Korma. Like all kormas, this variety requires the chicken to be cooked in a lot of yogurt. The secret ingredient would be the dried plums which add a distinct flavor to the dish. Find Aloo bukharas in your local market if dried yellow Plums are unavailable. 

Ingredients 

1) 1 entire chicken chopped into pieces
2) 8-10 dry Plums/Aloo Bukhara.
3) 1/2 cup Chana dal/Bengal gram.
4) 1 cup hung curd.
5) 1 tbsp chopped Ginger
6) 2 tbsp chopped garlic
7) 1/2 cup diced Onion
8) 4 Tomatoes, chopped
9) 4 green chilies, chopped
10) 1/2 cup oil
11) 2-3 tsp Salt
12) 1 tsp Turmeric

Recipe

1) Soak the dried Plums and Chana dal in two different bowls for 1/2-1 hour. Remove from water and keep aside.
2) In a pan, heat the oil on high heat. Fry the chicken slightly and remove. Fry the Ginger, garlic and Onion. Keep stirring. Lower the heat.
3) Add the hung curd and stir. Introduce the fried chicken into the pan and mix well. Next, add the Chana dal, plum, salt and turmeric. Stir and cover the pan with a lid. Let it cook for 10-15 mins.
4) Remove the lid and incorporate the chopped tomatoes and chilies into the korma. Cover with a lid, again and let it cook for 4-5 mins. Garnish the korma with Coriander leaves, Onion rings and Lemon slices. Serve with steaming rice or hot naan! :D


Leave a comment @Oishiibites

Use #oishiibites in the picture caption if you decide to try the recipe out and upload photographs. Enjoy!

Tuesday, July 8, 2014

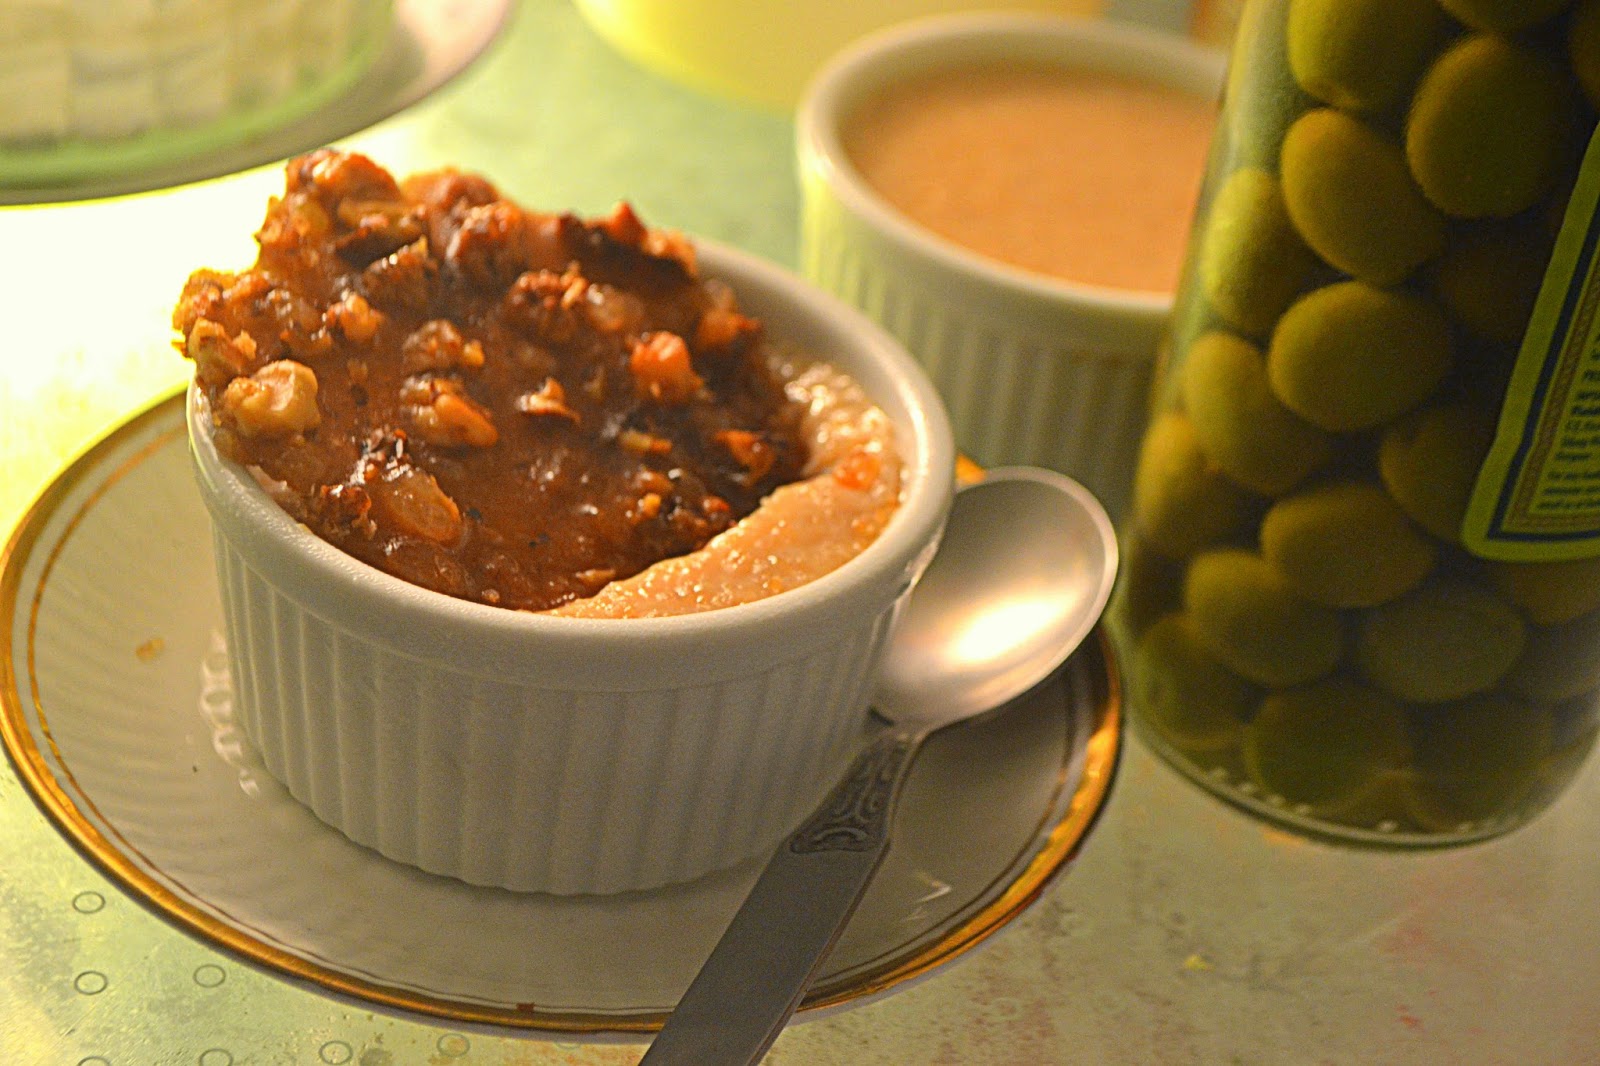
Crème brûlée. O__O

A little caught up with planning dad's birthday soiree, I have been frequenting the blog a lot less. This here in the picture was one of the main attractions. A classic Creme Brulee! The brittle burnt caramel layer on the top and the sweet and light custard base, makes for a winning dessert. Dad loved it. As you can see, this was done without a Blow torch and looks considerably different. But I couldn't be happier with the result. I can feel all the eyes rolling. :D It tasted absolutely divine! 

Ingredients

For the custard base(Serves 3)
1) 1 cup Cream
2) 2 egg Yolks
3) 4 tbsp castor sugar
4) 1 tsp Vanilla essence

For the Caramel layer
1) 1/2 cup sugar
2) 2 tbsp boiling Water

Recipe 

1) In a saucepan combine the cream and sugar on medium heat. Keep stirring until the cream begins to bubble. Remove immediately. Do not let it boil.
2) In a separate bowl, beat the egg yolks with the vanilla until it turns light and fluffy. Slowly pour the warm cream  and sugar mixture into the bowl to temper the egg yolks. Keep stirring when you pour the cream. Make sure there are no lumps. Pour into Ramekins.
3) Keep the ramekins in a water bath(fill with hot water) and bake in a preheated oven(160 C) for 45 mins. Set aside.
4) In a saucepan, mix 1/2 tbsp Water with the sugar. Keep stirring. When it becomes a little brown start adding the remaining of the water, slowly and stir until the mixture turns a little glossy(Around 5 mins).
5) Quickly pour a little bit of the hot caramel over the top of the set custard layer. Move the ramekins around with your hand so that the caramel evenly spreads out. Refrigerate for a few hours. Serve chilled!

Tip: Do not over caramelize the sugar(It should be golden brown as opposed to darker brown). Otherwise, it will turn extremely bitter. Pour a very thin layer over the top of the custard so that it looks more translucent as compared to my caramel layer in the picture.  :) Cheers!

Leave a comment @Oishiibites 

Use #oishiibites in the picture caption if you decide to try the recipe out and upload photographs. Enjoy!

Sunday, July 6, 2014

Falafel Wrap! :D

With leftover Rumali Rotis, from last night, I decided to make myself Falafel Wraps. Nothing beats Sunday snacking with hot and crispy Falafels wrapped in bread with cool Tzatziki sauce and Super crispy Semolina coated Potato fries. Num num num num! Serve em hot. :)

Ingredients

1) 1/2 cup Chickpeas, boiled.
2) 1/2 cup Soaked Chana dal/Bengal Gram.
3) 2 tbsp Roasted White sesame
4) 1 medium sized onion chopped
5) 4-5 cloves of garlic, chopped.
6) 2 green chilies, chopped
7) 1 tsp Red Chili powder
8) 2 tsp Cumin Powder
9) 1/4 cup chopped coriander leaves
10) 2 tsp Salt

Recipe

1) Blend the Chana dal and Chickepeas together, into a paste. Mix the rest of the ingredients with the paste. Mix well by hand.
2) Make flat round shapes and deep fry them(1 cup oil and medium heat).
3) Make the wrap by filling a Chapati/Kuboos/Roti/Pita(I used Rumali roti) with the Fried falafel, Raita/Tzatziki, Tahini sauce and semolina coated fried potato wedges. Serve!

Leave a comment @Oishiibites 

Use #oishiibites in the picture caption if you decide to try the recipe out and upload photographs. Enjoy!

Friday, July 4, 2014

Apple Fizz Sponge cake

While discussing recipes that should go up on my blog, a friend and I started talking about our first baking experience. We came to a consensus that most people start with a basic sponge cake. My friend rued that she still has a problem with how her sponge cakes dry out easily and become flaky over time. I shared my little secret as to how I keep the moisture intact. After all, Sponge cakes are supposed to maintain their beautiful spongy texture. So let us get back to the basics and make a traditional sponge cake! 

Ingredients 

1) 4 eggs
2) 2/3 cup+ 1 tbsp castor sugar
3) 2 cup Flour
4) 2 tsp Baking powder
5) 1 tsp Vanilla essence
6) 1/4 cup Melted Butter
7) 1 Apple finely sliced
8) 20-25 cherries.
9) 250 ml Appy Fizz( Secret ingredient. XD. One can use any aerated/carbonated drink.)
10) 1 tsp Lemon juice

Recipe 

1) Beat the eggs really well. Add 1/2 cup sugar to it and beat again. Sieve the flour and baking powder into the light egg and sugar mixture and fold it in. Add the vanilla essence and melted butter to this and mix well. Lastly, add the Apple fizz and mix well. Pour the mixture into a greased baking dish.
2) Slather the apple pieces with the 1 tbsp sugar and lemon juice. Organize the apple and cherries on top of the cake batter.
3) Bake in a preheated oven(180 C) for 45-50 mins. Remove from the mould after half an hour. Serve with ice cream!
Warning: Refrigerate. Cooked cherries won't remain fresh for more than 12 hours, otherwise. Either eat away, quick or use the cherries later to decorate the cake, once baked.

Leave a comment @Oishiibites 

Use #oishiibites in the picture caption if you decide to try the recipe out and upload photographs. Enjoy!

Thursday, July 3, 2014

Aushak. :)

Aushak/Ashak is an Afghan dumpling dish, traditionally served at family get-togethers. The strong flavour of the meaty lentil gravy perfectly compliments the delicate pasta. With time this dish grows on you. I cannot remember the first time I had tasted it, though. But every homecoming, I always place an order at 'Mom's soul food', if you know what I mean. :D A family favorite. 

Ingredients 

For the Pasta Dumpling 
1) 1 cup flour
2) 1 tsp Salt
3) 2 tsp Oil
4) 200 gm Chives, chopped.( If unavailable one can use Scallions or the green portion from Spring Onions.)
5) 1/2 cup finely chopped Coriander leaves
6) 2-3 tbsp Butter
7) 2 tsp Pepper

For the Meaty gravy 
1) 250-300 gm Mutton Keema
2) 4 medium sized onions, chopped.
3) 2 tbsp chopped garlic
4) 4 Tomatoes chopped into small cubes
5) 4 chilies, finely chopped.
6) 1/2 cup boiled Chana dal/Bengal Gram
7) 1 red capsicum, chopped.
8) 2 tbsp Oil
9) Salt to taste
10) 1 tsp Turmeric
11) 1/4 cup chopped Coriander leaves.

Recipe 

1) To make the pasta, combine the flour, salt and oil with some water and make a dough. Let the dough rest for half an hour. Combine the rest of the ingredients, well, with your hands.
2) To make the gravy, introduce the oil to a saucepan and caramelize the onion. Add the keema, garlic, chilies and stir for a minute. Add the rest of the ingredients and stir. Cover for 5-6 mins. When the gravy forms, remove.
4) Flatten the dough out on a surface using a rolling pin. Cut small squares out of the pasta sheet. Keep the filling in the middle of the small pasta sheet squares and seal. Boil the dumplings in hot water. They will start floating on the surface of the water, when cooked through and through.
5) To serve, whisk hung curd with a pinch of salt and crushed garlic. Make a bed using the yogurt on a serving plate, followed by the meaty gravy and the pasta dumplings. Serve hot!

Leave a comment @Oishiibites

Use #oishiibites in the picture caption if you decide to try the recipe out and upload photographs. Enjoy!

Wednesday, July 2, 2014

Classic Panna Cottas! :)

Panna Cotta literally translates to cooked cream, in Italian. Well, I don't think this dessert needs any further introduction. The versatility of the dessert lies in the fact that Panna Cottas can have myriad flavours. From more classic flavors like the vanilla and lemon Panna Cotta in the picture, one can make a Nutella or a Saffron Panna Cotta. I served mine with Cherry and Grape Compote. Unfortunately, I was too excited to remove them from their moulds, properly. The Picture below shows your average Panna Cotta in all its glory. ^_^ 

Ingredients 

1) 1/2 cup Milk
2) 1 cup Fresh Cream
3) 1/4 cup castor sugar
4) 3 tsp Gelatin Powder
5) 1/2 tsp Vanilla essence/ Lemon rind from a lemon.

Recipe 

1) Pour the milk in a pan. Sprinkle the Gelatin powder over it. Let it rest for 5 mins until the top of the milk shrivels a little.
2) Start heating the pan over medium heat. Stir until the Gelatin dissolves. Do not boil or let the milk simmer.
3) When the gelatin dissolves, add the sugar and cream. Keep stirring and mix well. Remove before it simmers and pour into two different places. Add the vanilla essence in one and lemon rind in another. Divide the mixture into greased ramekins or any other small containers. Refrigerate overnight for the best result. Remove from the mould after keeping it outside for at least half an hour. Serve chilled!


Leave a comment @Oishiibites

Use #oishiibites in the picture caption if you decide to try the recipe out and upload photographs. Enjoy!

Tuesday, July 1, 2014

Fish and Rice Rolls. :)

A packet of Wasabi was a surprise find in the departmental store, this weekend. This let to a hankering for Sushi in the middle of the week. Since I did not find it feasible to make Sushi, being the inexperienced newbie cook that I am, I decided to make something else. Get them chopsticks out to dip these spicy steamed Fish And Rice rolls in Soya and Wasabi. The only thing missing was a fresh Daikon and Cucumber salad. :( Oh well! 

Ingredients 

1) 300 gm White boneless and skinless fish(Ex: Basa or Bhetki)
2) 1 medium sized Onion chopped
3) 4 green chilies
4) 2 tbsp Chopped Coriander leaves.
5) 2 tbsp of the green portion of the Spring Onion chopped.
6) 2 tsp Oil
7) 2 tbsp Corn flour
8) 1/2 cup well soaked Basmati rice(uncooked).
9) Salt to taste
10) 1 tsp Lemon Juice

Recipe

1) Grind all the ingredients(sans the Basmati rice) in the blender. Blend until the mixture is quite fine.
2) Make round balls out of the mixture using your palm(Grease the palm with a little bit of oil).
3) Spread out the soaked Basmati on a plate. Roll the round shaped fish mixtures out on the Basmati bed until it is completely covered.
4) Steam in a steaming bowl or any other steaming appliance for 15-20 minutes.(Remember to keep sufficient space between two fish balls, while steaming) Serve hot with Soya and Wasabi!

Leave a comment @Oishiibites 

Use #oishiibites in the picture caption if you decide to try the recipe out and upload photographs. Enjoy!

Saturday, June 28, 2014

Barishali Chingri Pithe! :D

'Chingri Pithe' is a kind of prawn coconut cake, cooked in Banana leaves and finds its origin in Bangladesh. My mother has fond memories of my grandmother preparing it for her family, on Sundays. I still remember the strong smell of Prawn cakes overwhelming my senses, on rare days when mother found good Banana leaves at the bazaar. This dish has close associations with my childhood. My first attempt at it wasn't all that bad. Read ahead to know how one can cook the 'Chingri Pithe' in the microwave, as well. :) 

Ingredients

1) 200-250 gm/ 1 cup peeled prawns
2) 1 1/2 grated Coconut
3) 1 tbsp Sugar
4) 4-5 Green chilies
5) 2 tsp Salt
6) 2 tbsp Oil
7) 2 tsp Turmeric
8) Traditional recipe requires 2 big square sized Banana leaf pieces.
(Follow the recipe to know how to make it in the microwave) :)

Recipe 

1) Blend the grated coconut into a fine paste. Add all the other ingredients to this paste and blend well.
2) Grease one side of the banana leaves(The matte side) with oil. Grease a flat pan with some oil, as well.
3) Place the blended coconut prawn mixture on one of the banana leaves and flatten it out(Approx 1/4 inch on the side). Place the banana leaf on the flat pan and cook the prawn coconut mixture on medium heat. Cook it underneath a lid.
4) After 10-12 minutes remove the half done cake(along with the banana leaf) to another plate. Place your second banana leaf on top of the prawn cake followed by another plate. Turn it upside down to transfer it to the second banana leaf. Place it on the flat pan again and cook for another 10 minutes on medium flame.(Follow this step closely. The cake is extremely delicate and might fall apart, if not executed properly). Remove(use the same process to transfer to a serving space) and serve hot with lemon rind and lemon juice squeezed on top.

5) Alternate method(This process can not substitute for the beautiful banana leaf flavor that enters into a prawn cake prepared in the conventional way): Place the mixture on a grill proof plate/pan and flatten the mixture out(1/4 inch on the side). Place it on the high rack and cook for 6-8 mins at 450W+Grill(Micro+Grill function).

Leave a comment @Oishiibites

Use #oishiibites in the picture caption if you decide to try the recipe out and upload photographs. Enjoy!

Friday, June 27, 2014

Red Velvet Cakes with American frosting

It is absolutely unnecessary to introduce red velvet cakes/cupcakes to any dessert savant. This particular recipe that my mother uses has been around for the longest time and more importantly, I hear that a certain famous bakery, swears by it. :D The Cheat American Frosting recipe on the other hand is a gem that has been used in my friend's house for generations. I was glad when she introduced me to it, since Buttercream frosting isn't my favorite and the Cheesecream one is not really an affordable option. Do you see why this is so special? Valentines day might be far away but there isn't really a good time to devour red velvet cakes, now is there? ;)

Ingredients 

For the cake(One can make 12 cupcakes with the very same measurements)
1) 1 1/4 Flour
2) 1 tbsp Cocoa powder
3) 4 tbsp Butter
5) 1/4 tsp Baking powder
6) 12 tbsp Granulated sugar
7) 1/2 tsp Vanilla essence
8) 1 egg(Grab the largest one XD)
9) 1/2 cup Buttermilk(Google how to make buttermilk if unavailable) :P
10) 1 tbsp Red food colouring.
11) 1/2 tsp White Vinegar
12) 1/2 tsp Baking soda

For the American Frosting
1) 2 1/2 tbsp Flour(Yes, yes do not freak out!)
2) 1/2 cup Milk
3) 1 tsp Vanilla essence
4) 1/2 cup Castor Sugar
5) 1/2 cup Butter

Recipe

Cake
1) Sift together the flour, baking powder and cocoa with a pinch of salt.
2) Beat the butter in a bowl until soft. Add the sugar and beat for another 2 mins until light and fluffy. Add the egg and vanilla essence. Whisk and incorporate properly.
3) In a separate bowl, whisk the butter milk and the red food coloring.
4) Add the buttermilk and the flour mix to the butter mixture, in parts and whisk slowly. This is your cake batter.
5) Combine the vinegar with the baking soda and let it react(it will fizz up). Quickly fold it into your cake batter. It will achieve a beautiful pale red colour.
6) Divide the batter into a cupcake/mini cake tray and bake in a preheated oven(180 C) for 20-25 mins. Cool on a wire rack for 10 mins. Set aside.

Frosting(Should be consumed in the next 24 hrs)
1) Add the Flour to the Milk and mix well. Whisk over medium heat until the mixture congeals and becomes thick. Remove from heat. Add the Vanilla essence to the cooled mixture.
2) Whisk the butter and sugar in a bowl until light and fluffy. Incorporate the flour mixture(must be cool) into the butter sugar mixture. Whip it again until it has a whipped cream consistency(Whip for a little less that a minute). Voila!

Simply coat your mini cakes/cup cakes with the American Frosting. Mom made it even more sinful with Nutella and a piece of KitKat on top. 

Leave a comment @Oishiibites

Use #oishiibites in the picture caption if you decide to bake a batch and upload photographs. Enjoy!

Wednesday, June 25, 2014

Tortilla Espanola!

Recently, a friend showed me how to make a Spanish Omelette in the microwave. I love Tortilla Espanola especially because it makes for such a complete meal. Serve a few pieces with  freshly made coffee and toast, and you have a spectacular breakfast ready! This is one of the easiest microwave ready recipes that I know. :D  

Ingredients 

1) 3 eggs
2) 2 tbsp Milk
3) 1 tomato cut up into cubes.
4) 1 potato cut up into medium sized cubes
5) 1 chopped onion
6) 2 tsp Salt and Pepper

Recipe 

1) Mix the milk and eggs together. Add herbs, salt and pepper to the mixture. (I add a lot of dried basil and oregano).
2) Preheat a grill proof Plate for 5 mins using the 600W+Grill(Micro+Grill) feature in your Convection microwave.
3) Spread the Tomato, potato and Onion evenly on the heated plate. Pour the egg and milk mixture all over it. Place the plate on a high rack and cook in the microwave(450W+Grill) for 5 mins. Your Tortilla Espanola is ready. Serve hot with cilantro leaves on top. :D

Leave a comment @Oishiibites 

Use #oishiibites in the picture caption if you decide to try the recipe out and upload photographs. Enjoy!

Tuesday, June 24, 2014

Lemon Ginger pots. :D

I have made this dessert, quite a few times, over summer, this time around. Other than the absolutely delightful combination of the ginger biscuits with the lemony custard middle, this dessert has been made over and over simply because of how easy it is to make it. On days, when I did not have enough time to put together a more complex dessert, I have made the 'Lemon Ginger Pots' while carrying on a conversation with my guests. Easy, breezy and supremely... tasty! Num num!!! ^__^

Ingredients(Serves 5)

1) 2 eggs separated
2) 2/3 cup Condensed Milk
3) Juice and zest from 1 lemon
4) 1 tsp Vanilla essence
5) 1/4 tsp White Vinegar
6) 4 tbsp Castor Sugar
7) 10 Ginger Biscuits
8) 30 gm Butter

Recipe 

1) Blend the Biscuits and Butter together. Use to make the bottom layers of five greased ramekins.
2) Whisk the condensed milk, egg yolks, vanilla essence, lemon juice and zest together. Pour it out on top of the bottom  layer.
3) Add the White vinegar to the Egg whites and start whisking. Add the Sugar slowly, while whisking, until the egg whites hold soft peaks. Spoon the meringue out on top of the Condensed milk layer.
4) Bake in a preheated oven(180 C) for 15 mins or until the meringue becomes slightly brown and fluffy. Chill in the refrigerator for an hr and serve it with Apple cubes on the top. :D


Leave a comment @Oishiibites 

Use #oishiibites in the picture caption if you decide to try the recipe out and upload photographs. Enjoy!

Monday, June 23, 2014

The Baba Ghanoush Bruschetta! :)

I love smoked, charred and grilled food. Period. But yes, lots of arched eyebrows at the mention of something that doesn't remotely sound healthy, not so much! :P This weekend we decided to make a Bruschetta with Baba Ghanoush and Grilled Chicken on top. A combination that never ever disappoints. Pour out some wine if you must! ^___^ 

Ingredients 
 
For the Tahini Sauce>
1) 1/4 cup roasted White sesame
2)  4 cloves Garlic
3) 3 tbsp Lemon Juice/White Vinegar
4) 2 tsp ground Roasted Cumin Seeds
5) 1/2 tsp Salt

For Baba Ghanoush> 
1) 1 Egg plant
2) 2 tsp Lemon Juice
3) 1/2 tsp Salt

Recipe

1) To make the Tahini Sauce, grind the White sesame into a fine powder and mix with the rest of the ingredients.
2) Char the eggplant on the open fire of a gas stove. Clean with water and peel the skin off. Blend the pulp of the eggplant with the salt in a mixer grinder. To this add the Lemon Juice and 2 tbsp of the Tahini sauce. Mix well. Your Baba Ghanoush is ready!
3) Cut pieces of bread out from a Baguette( I used market bought Chili cheese breads :| ). Toast the breads slightly and rub with a peeled clove of garlic(chop in half and use the flat side). Spoon out a lot of Baba Ghanoush on the bread. Top it with some fresh Tomato cubes, grilled Chicken pieces(I charred cooked chicken pieces on the open fire of a stove and used a scissor to snip off long pieces) and coriander. Drizzle with some Olive oil and serve!

Leave a comment @Oishiibites

Use #oishiibites in the picture caption if you decide to try the recipe out and upload photographs. Enjoy!

Sunday, June 22, 2014

Litchi Roche! ^__^

My mother and her need to innovate when it comes to the art of gift giving has fascinated me, for decades. She can very well be the 'Ted Mosby' of our family(Not an obscure reference, at all!) when it comes to adding that little something personal into each and every present that has been wrapped over the years. So after much inculcation, even at the cost of sounding conceited, I must say, I haven't fared all that bad. With a box of Kalakand resting in the refrigerator, mommy dearest made something she called 'The Litchi Roches' as a surprise for someone. I did quite a shoddy job trying to make pretty little things out of them. :( The box mother packed, looked impeccable! (No pictures. Sorry! :P)

Ingredients

1) 10-12 Litchis
2) 2-3 Kalakand sweets
3) 75 gm Dark Chocolate. Cooking chocolate not required.
4) 1/2 tbsp Butter
5) 4-5 Almonds
6) 1 cup Grated coconut

Recipe 

1) Toast the Almonds and chop them into fine pieces. Toast the Grated coconut and keep aside.
2) Mash the Kalakand with the chopped almond. Peel the Litchis and remove the seed carefully to keep the fleshy exterior intact. Fill the litchis up with the Kalakand mixture. Refrigerate the litchis for 10-15 mins.
3) Meanwhile, in a double boiler melt the chocolate. Once the chocolate melts, add the butter and stir well. Remove the pan.
4) Using a toothpick dip the litchis in the chocolate and roll it out in the toasted coconut. Chill for 3-4 hours. Serve!

Leave a comment @Oishiibites

Use #oishiibites in the picture caption if you decide to try the recipe out and upload photographs. Enjoy!

Saturday, June 21, 2014

Potato Chip Gratin! O__O

Midnight hunger pangs are quite a threat to steady binge watching of late night Television. Funnily, while surfing the T.V on one such nights, I tuned into 'Comedy Central' and a soap named 'The Mindy Project' was on. The protagonist was at the dinner table, extolling something which she referred to as the 'Potato Chip Pie'. Fifteen minutes of futile internet search after, I realized such a pie was a food world myth. Nevertheless, I decided to change my standard 'Potato Au Gratin' recipe into a 'Potato chip Gratin' and my oh my, it tasted unbelievably good. Hurrah! :D

Ingredients

1) 2 Potatoes
2) 1 tomato
3) 1 Bell Pepper
5) 1/2 cup Cream
6) 50 gm Cheese
7) A packet of Chips

Recipe

1) Boil the potatoes and chop them into small sized cubes. Season with salt and pepper.
2) Char the Tomato and Bell pepper over fire(Gas Stove). Chop them into smaller pieces and season with salt and pepper.
3) Make Layers(in a baking dish) using the the chopped potatoes, tomato and bell pepper. Make sure to use the diced potatoes as the first and last layer.
4) Pour the cream over the layers. Top it with crushed Potato chips and shredded cheese.
5) Bake in a preheated oven(180 C) for 20 mins. Serve hot!


Leave a comment @Oishiibites 

Use #oishiibites in the picture caption if you decide to try the recipe out and upload photographs. Enjoy!

Friday, June 20, 2014

Airy Tarte Au Chocolat! ;)

Some time ago, when I had made a small little stop in Tokyo, Japan, I remember having had a chocolate tart from a cute little Japanese Patisserie in Shinjuku. It had a light and fluffy chocolate filling instead of the more traditional dense Belgian chocolate one. While they had served me a piece with Macadamia Nuts and a dollop of Icecream, I decided to serve my light and airy Chocolate Tart with a Peanut Butter crumble. :D It is fascinating how fond memories from trips taken, often inspire us to create something redolent of these very same memories, in order to relive certain moments. Every bite into the tart will always remind me of watching hordes of people from my quaint corner as they passed by and disappeared into crowded streets. :) 

Ingredients 

For the Pastry bottom
1) 1 1/2 Cup Flour
2) 1/2 cup Butter
3) 2 tbsp Sugar
4) 3-4 tbsp Cold Water

For the Filling 
1) 1 1/2 cup milk
2) 2 tbsp Cocoa powder
3) 3 tbsp Castor sugar
4) 2 eggs separated
5) 1 tsp Vanilla essence
6) 3 tbsp Hot water
7) 1 tbsp Powdered Gelatin

Recipe 

1) Combine the ingredients of the pastry, together. Refrigerate the dough for 20 mins in an airtight container.
2) Using a Rolling pin spread the dough out(1/4 cm/6 mm thin). Press into a Tart/Pie dish. Prick the bottom and sides of the Tart Pastry, using a fork.(This helps to release the vapor when the pastry bakes). Bake in a Preheated oven(200 C) for 15-20 or until the pastry becomes golden brown. Remove from the Tart dish.
3) Meanwhile, Combine milk and cocoa. Stir over medium heat until milk boils.
4) Beat egg yolks, Sugar and vanilla in a separate bowl until light. Add the chocolate milk to the egg mixture and beat well. Stir this mixture over gentle heat(do not boil) until it thickens, slightly. Remove.
5) Dissolve 1 tbsp Gelatin powder in 3 tbsp Hot water. Add this to the slightly thickened mixtur and stir in well. Let it cool down.
6) Whip the egg whites in a separate bowl until they hold peaks. Fold them into the cooled down mixture and pour it into the already baked tart pastry. Chill overnight in the refrigerator. Serve it with Peanut butter biscuit crumb(Simply blend peanut butter and digestive biscuits in a blender until it forms a crumble.).


Leave a comment @Oishiibites 

Use #oishiibites in the picture caption if you decide to try the recipe out and upload photographs. Enjoy!

Thursday, June 19, 2014

Coconut Prawn with Mango Salsa! ^__^

The combination of coconut and shrimp, in my opinion, always works. Hence, people have invented myriad recipes over time, with these two ingredients in mind. This is a simple baked coconut recipe, I had found out years ago and has often rescued me on days when friends had come over uninformed. I prefer to make it during the summer when Mango is aplenty in the market and I can serve the prawns with a side of sweet and spicy Mango Salsa. Perfect!!! 

Ingredients 

For the Coconut prawns 
1) 12 Medium sized Prawns
2) 1 egg
3) 2 tbsp Coconut Milk
4) 2 tbsp Corn Flour
5) 1/2 tsp Salt
6) 1/2 grated coconut+2 tbsp Bread crumbs

For the Mango Salsa 
1) 1 ripe mango, chopped up.
2) 1 small sized onion, chopped.
3) 1-2 green chilies, chopped.
4) A Sprig of Coriander, chopped.
5) 1 tsp Oil
6) 1/2 tsp Salt

Recipe 

1) Rub the prawns with the salt and keep aside.
2) Mix together the egg, coconut milk and the corn starch.
3) Soak the prawns in the coconut milk mixture and coat it with the grated coconut and breadcrumb mix.
4) Bake in an oven for 15-20 mins at 180 C.
5) Meanwhile make the salsa by mixing all the ingredients together.
6) I served the prawns, hot with Tortilla Espanola(This here wouldn't be the Tortilla I make, usually, Another easy recipe to go up on the blog, I guess. :D) and home made Mango Salsa. Yum!

Leave a comment @Oishiibites

Do use #oishiibites in the picture caption if you try the recipe out and upload photographs. Enjoy!

Wednesday, June 18, 2014

Mango and Chiku Cobbler

Fun are the evenings, when friends get together with ingredients scraped out from their pantry, to bake something easy, supremely easy! Fellow food enthusiast and my friend from university, Aayoti and I had a middle of the week rendezvous because I had to try out her 'Mango and Chiku Cobbler'. Nervous until the oven's timer shut down, Aayoti paced the room hoping that her dessert turns out to be exactly how she wanted it. Lo and behold, out came this absolutely decadent dessert that did not survive half an hour. Guest blogger for the day was delighted and I have to agree that this was one of the easiest recipes I have come across, in a while! Gorgeous, innit? :D 

Ingredients

1) 1 1/4 cup Flour
2) 50 gms Butter
3) 1 cup Milk
4) 1 tbsp Baking powder
5) 1 tsp Vanilla essence
6) 1/2 cup Castor Sugar
7) A cup of Mango and Sapodilla(Chiku/Sabeda) pieces. One can use any other juicy fruit! (Berries are perfect. Peach cobblers are very popular!)

Recipe

1) Melt the butter in the baking tray, directly. Do not use the butter to grease the pan.
2) In a bowl, bring all the ingredients together(except for the fruits) and mix well. Pour it on top of the melted butter bed. Do not stir or mix.
3) Carefully place the fruits on top of the mixture, already introduced into the baking dish. None of the layers should be mixed together.
4) Bake in a preheated oven(180 C) for 50 mins. Serve hot with a side of Vanilla ice cream. Drizzle the ice cream with honey. The honey complements the flavor of the Chiku, wonderfully! :D


Leave a comment @Oishiibites

Use #oishiibites in the picture caption if you decide to try the recipe out and upload photographs. Enjoy!

Tuesday, June 17, 2014

Pao Paneer Rolls

The habit of having to eat something deep fried and hot, on rainy days, refuses to abandon my household. I have fond memories of my mother making hot 'pakodas' on days when the downpour lasted hours. This would always be accompanied by hot ginger chai(tea) and conversations revolving around music. With the monsoon finally making its way into our lives, the craving for something hot and crispy has inevitably knocked on the door. So we made a plate of Spicy 'Pao Paneer Rolls' to munch on! Num num num num! 

Ingredients 

1) 7-8 pieces of bread
2) Breadcrumbs using all the sides of the bread.
3) 200 gm Paneer
4) 1 large Onion finely chopped
5) 1 tbsp chopped ginger
6) 1 tbsp chopped garlic
7) 2 green chilies chopped
8) 1 tsp Red chili powder
9) 1 Sprig of coriander leaves finely chopped
10) 1 cup oil for frying
11) 2 tbsp Cornflour
12) 2 tbsp Ketchup
13) 2 tsp Cumin seeds
14) 2 tsp Garam Masala/All Spice
15) Juice from 1/2 a lemon

Recipe

1) In 2 tbsp of heated Oil, add the cumin seeds. When it crackles, throw in the chopped onion and stir for 30 secs. The chopped ginger and garlic goes in next. Fry for a minute.
2) Next, add the coarsely smashed Paneer, chili, chili powder, salt and the ketchup. Stir for a few minutes. Introduce 1 tbsp Cornflour into the pan so that the mixture tightens. Add the garam masala. coriander leaves and the lemon juice, right before removing the pan from the heat. Bring it down to room temperature. Make 7-8 cylindrical shapes out of the mixture.
3) Soak the bread in water. Squeeze the water out using your palms. Do not deform the shape of the bread.
4) Place the Paneer mixture into the bread and seal.
5) Add 2 tsp water in the remaining 1 tbsp Cornflour in order to dilute(This will prevent excess oil from entering the rolls). Dip the rolls in the diluted cornflour and coat them with the bread crumbs. Deep fry in the oil(2-3 at a time) until crispy and golden brown. Serve hot!

Leave a comment @Oishiibites

Use #oishiibites in the picture caption if you try the recipe out and upload photographs. Enjoy!

Sunday, June 15, 2014

Lemon Butter cookies!

Last week, I was in Darjeeling. A small family trip, of sorts. I miss my habit of walking down to 'Glenary's' early in the morning to sip on their coffee and salty biscuits, that I love so much. With all the gastronomical missing happening, I decided to take up the cudgels to bake myself a fresh batch of cookies. I always love my cookies on the line of the famous 'Melting Moments', Julia had prepared on Masterchef Au. In other words, I love it when cookies melt in your mouth. So, an oven fresh batch of Lemon Butter cookies were made and devoured with a steaming cup of hot Cappuccino. :D No wonder there! 

Ingredients 

1) 1 1/2 cup Flour
2) 1 egg
3) Zest from 2 Lemons+ Juice from one.
4) 125 gm Butter
5) 100 gm castor sugar
6) 1/4 tsp Baking powder


Recipe

1) Beat the butter and sugar really well until light.
2) Beat in the egg.
3) Add the lemon juice, zest, baking powder and the flour to make a dough. Knead lightly. If the dough doesn't tighten add an extra 1/4 cup flour.
4) Wrap the dough in a cling film or keep in an airtight container. Refrigerate for 20 mins.
5) Take small portions from the dough and flatten it out on a baking tray in the shape of flat round cookies. (I thin it out, usually!)
6) Bake in a preheated oven(180 C) for 15-20 mins or until the edges become golden brown. Serve it with hot coffee!

Leave a comment @Oishiibites

Use #oishiibites in the picture caption if you decide to try the recipe out and upload photographs. Enjoy!

Saturday, June 14, 2014

Chicken Roast in Jaggery Tamarind glaze! :)

Weekends make me happy, mostly because something new and interesting, beckons to be cooked. This weekend we decided to tweak a certain Chicken Roast recipe, due to the unavailability of a lot of ingredients and made something that turned out to be mindbogglingly fantastic. This here, shown in the picture is our Jaggery and Tamarind glazed Chicken Roast! I reckon, the glaze can easily be used to cook Pork ribs on a Barbecue special Sunday afternoon. 

Ingredients

1) 4-5 Chicken Pieces with the skin on them.
2) 100 gm Jaggery(Gur)
3) 4 tbsp Tamarind pulp
4) 2 tbsp Red Chilli Powder
5) 1 tbsp Chili Flakes
6) 3 tbsp Salt and Pepper
7) 2 tbsp Cumin(Jeera)
8) 2 tbsp Coriander powder/paste
9) 2 tbsp Lemon Juice
10) 2 tbsp Fennel Seed(Mouri)
11) 2 tbsp Crushed Ginger and Garlic
12) 2 tbsp Garam Masala/All Spice
13) 2 tsp Oil

Recipe

1) Make slits on the chicken surface and rub it with pepper and salt.
2) Caramelize the jaggery in a pan over medium heat and add the rest of the ingredients in it. Stir constantly until it thickens a little. Remove from heat.
3) Slather the chicken pieces with the Jaggery and Tamarind glaze and bake in a preheated oven(160 C) for 50 mins to an hour. (Place it on a high rack if possible) Now bake both the chicken sides at 200 C for 5 mins each and remove. Squeeze lemon juice and sprinkle Oregano on it. Serve it hot with Naan bread. :D


Leave a comment @Oishiibites 

Use #oishiibites in the picture caption if you decide to try the recipe out and upload photographs. Enjoy!